Showing posts with label javascript. Show all posts

Tuesday, 13 September 2016

Customizable Related Posts Widget for Blogger

We already posted a few tutorials on how to add related posts widget with thumbnails in Blogger with summaries or only titles, which can be compiled into a single All-In-One Widget with powerful options. This new customizable related posts widget for Blogger integrates all the features we've seen before and more, such as thumbnails (square or round), post dates, excerpts, display only titles / thumbnails.

Now let's see what this related posts blogger widget has to offer.

related posts widget, blogger widget

Features:

- 9 attractive styles to match your needs
- Show Title, excerpt & thumbnails
- Display simple related posts with titles / summaries / post date
- Choose whether to display the post thumbnails or not
- Ability to control the thumbnail image size
- Option to choose square or round thumbnails
- Show post text excerpts
- Control the length of the post excerpt / title
- Determine the number of related posts to display

Requirements:

The related posts widget recognizes post thumbnails uploaded through Blogger itself (or Picasa Web Albums), other images from Photobucket, Flickr, or other non-Blogger hosts will not be supported.

This widget is compatible with the standard desktop Blogger templates except Dynamic Views, which does not accept customization.

The script does not work on private blogs, so your blog / site must be open to the public in order to show.

Adding Customizable Related Posts Widget in Blogger

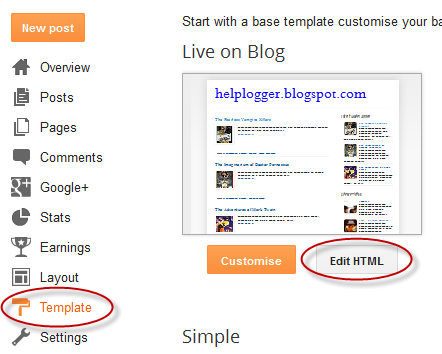
Log into your Blogger dashboard, go to 'Template' and open template editor by clicking the 'Edit HTML' button below 'Live On Blog' preview.

Next, we're going to use the template search feature, be sure to follow these directions exactly:

1. Place your cursor on the template code.
2. Click once.
3. Press CTRL and F at the same time (PC) or Command and F (Mac).

The search box will open in the upper right corner of the template editor.


Type </head> in the search box, then press ENTER. This will take you to the </head> tag in your template and highlight it in yellow.

Select and copy the entire CSS style below and paste it directly ABOVE the </head> tag:
<style type='text/css'>
.related-posts-container{margin:55px 0px;}.related-posts-container h4{font:20px &#39;Open Sans&#39;, sans-serif;margin-bottom:20px;}.related-posts-container ul,.related-posts-container ul li{list-style: none;margin: 0;padding: 0;}.related-posts-container ul li a{text-transform:capitalize !important;font:bold 13px &#39;Open Sans&#39;, sans-serif;outline: 0;}.related-snippets{margin-top:5px;font:italic 12px &#39;Open Sans&#39;, sans-serif;}.related-posts-1 li{list-style:inside none disc !important;}.related-posts-1 li,.related-posts-2 li{border-top:1px solid rgba(0,0,0,0.04);padding:0.8em 0 !important;}.related-posts-1 li:first-child,.related-posts-2 li:first-child{border-top:medium none;}li.related-post-item{margin:0 3% 3% 0 !important;width:22.7%;float:left;list-style:none;position:relative;}li.related-post-item:last-child{margin:0 0 2% !important;}.related-thumb-large{width:100%;height:auto;border:none;margin:0px auto 10px;padding:0 !important;}.related-posts-8 li .related-title,.related-posts-9 li .related-title,.related-posts-9 li .related-snippets{padding-left:74px;}.related-posts-8 li:nth-child(even),.related-posts-9 li:nth-child(even){margin:0 0 4% !important;}.related-posts-8 li,.related-posts-9 li{background-color:#ffffff;box-shadow:0 0 4px rgba(180, 180, 180, 0.55);width:42% !important;float:left;margin:0 4% 4% 0 !important;padding:3% !important;}.related-thumb{float:left;height:64px;margin-right:10px;object-fit:cover;width:64px;}.related-posts-6 li,.related-posts-6 a{line-height:0 !important;}.related-posts-6 .related-thumb-large{margin-bottom:0;}.related-posts-7 li.related-post-item{margin:0 !important;width:25% !important;}.related-wrapper{position:absolute;left:0px;right:0;top:0px;bottom:0;margin:0 auto;z-index:4;background:rgba(77,77,77,0.2);}.related-wrapper-inner{position:relative;height:100%;z-index:99;width:100%;display:table;vertical-align:middle;text-align:center;-moz-box-sizing:border-box;-webkit-box-sizing:border-box;box-sizing:border-box;}.related-wrapper .related-title{vertical-align:middle;display:table-cell;color:#ffffff;font:bold 16px &#39;Open Sans&#39;, sans-serif;padding:0 20px;}.related-date{margin-top:5px;font:italic 11px &#39;Open Sans&#39;, sans-serif;color:#999999;}
</style>

Next, we need to add the script  - search for the following line:
<b:includable id='postQuickEdit' var='post'>

Once you found it, click the small arrow not beside it but with one level above to expand code and scroll down until you see </b:includable> - right below this tag, you should see the line including the "postQuickEdit" id.

See the screenshot for more help:


Just ABOVE the </b:includable> tag, add the following script:
<b:if cond='data:blog.pageType == &quot;item&quot;'>
<div class='related-posts-container' id='related-posts-widget'/>
<div style='clear: both;'/>
<script type='text/javascript'>
var labelArray = [<b:if cond='data:post.labels'><b:loop values='data:post.labels' var='label'>&quot;<data:label.name/>&quot;<b:if cond='data:label.isLast != &quot;true&quot;'>,</b:if></b:loop></b:if>];
var relatedSettings = {
blogURL:&quot;<data:blog.homepageUrl/>&quot;,
relatedHeading:&quot;&lt;h4&gt;&lt;span&gt;Related Posts&lt;/span&gt;&lt;/h4&gt;&quot;,
relatedPosts:4,
relatedStyle:4,
thumbnailSize:&quot;w300-h200-p-nu&quot;,
defaultThumb:&quot;https://blogger.googleusercontent.com/img/b/R29vZ2xl/AVvXsEivMgO4cb0Li2DzMwD15ASM3OPq_MrE9JDuIjQ8pw3McjAXhPwxBCidUd8Vb-FZBzDfw6YlhOVT22mY4c8jOKymSyQTNzwP13zw_rbv6f7eKQBmoBzk7tOa_4zSmA252fLIYqFpbGLZT4tx/300-h200-c/no-thumb.png&quot;,
roundThumbs:false,
titleLength:&quot;auto&quot;,
snippetLength:45,
centerText:false,
openNewTab:false
};</script>
<script type='text/javascript'>
//<![CDATA[
var randomRelatedIndex,startRelated;!function(a,b,c){var d={callBack:function(){}};for(var e in relatedSettings)d[e]="undefined"==relatedSettings[e]?d[e]:relatedSettings[e];var f=function(a){var d=b.createElement("script");d.type="text/javascript",d.src=a,c.appendChild(d)},g=function(a,b){return Math.floor(Math.random()*(b-a+1))+a},h=function(a){var c,d,b=a.length;if(0===b)return!1;for(;--b;)c=Math.floor(Math.random()*(b+1)),d=a[b],a[b]=a[c],a[c]=d;return a},i="object"==typeof labelArray&&labelArray.length>0?"/-/"+h(labelArray)[0]:"",j=function(a){var b=a.feed.openSearch$totalResults.$t-d.relatedPosts,c=g(1,b>0?b:1);f(d.blogURL.replace(/\/$/,"")+"/feeds/posts/summary"+i+"?alt=json-in-script&orderby=updated&start-index="+c+"&max-results="+d.relatedPosts+"&callback=startRelated")},k=function(a){var l,m,n,o,p,q,b=document.getElementById("related-posts-widget"),c=h(a.feed.entry),e=d.relatedStyle,f=d.relatedHeading+'<ul class="related-posts-'+e+'">',g=d.openNewTab?' target="_blank"':"",i=d.centerText?"text-align:center;":"",j=d.roundThumbs?"-webkit-border-radius:50%;-moz-border-radius:50%;border-radius:50%;":"",k='<span style="display:block;clear:both;"></span>';if(b){for(var r=0;r<d.relatedPosts&&r!=c.length;r++){n=c[r].title.$t,o="auto"!==d.titleLength&&d.titleLength<n.length?n.substring(0,d.titleLength)+"&hellip;":n,p="media$thumbnail"in c[r]&&d.thumbnailSize!==!1?c[r].media$thumbnail.url.replace(/\/s[0-9]+(\-c)?/,"/"+d.thumbnailSize):d.defaultThumb,l=h(c[r].published.$t);for(var s=[1,2,3,4,5,6,7,8,9,10,11,12],t=["January","February","March","April","May","June","July","August","September","October","November","December"],u=l.split("-")[2].substring(0,2),v=l.split("-")[1],w=l.split("-")[0],x=0;x<s.length;x++)if(parseInt(v)==s[x]){v=t[x];break}postdate=v+" "+u+" "+w,q="summary"in c[r]&&d.snippetLength>0?c[r].summary.$t.replace(/<br ?\/?>/g," ").replace(/<.*?>/g,"").replace(/[<>]/g,"").substring(0,d.snippetLength)+"&hellip;":"";for(var y=0,z=c[r].link.length;y<z;y++)m="alternate"==c[r].link[y].rel?c[r].link[y].href:"#";1==e?f+='<li><a href="'+m+'" '+g+">"+o+"</a></li>":2==e?f+='<li><a href="'+m+'" '+g+'><div class="related-title">'+o+'</div></a><div class="related-snippets">'+q+"</div></li>":3==e?f+='<li class="related-post-item" style="'+i+'"><a href="'+m+'" '+g+'><img alt="" class="related-thumb-large" src="'+p+'" style="'+j+'"><div class="related-title">'+o+'</div></a><div class="related-snippets">'+q+"</div></li>":4==e?f+='<li class="related-post-item" style="'+i+'"><a href="'+m+'" '+g+'><img alt="" class="related-thumb-large" src="'+p+'" style="'+j+'"><div class="related-title">'+o+'</div></a><div class="related-date">'+postdate+"</div></li>":5==e?f+='<li class="related-post-item" style="'+i+'"><a href="'+m+'" '+g+'><img alt="" class="related-thumb-large" src="'+p+'" style="'+j+'"><div class="related-title">'+o+"</div></a></li>":6==e?f+='<li class="related-post-item"><a href="'+m+'" '+g+'><img alt="" class="related-thumb-large" src="'+p+'" style="'+j+'"><div class="related-wrapper" style="'+j+'"><div class="related-wrapper-inner"><div class="related-title">'+o+"</div></div></div></a></li>":7==e?f+='<li class="related-post-item"><a href="'+m+'" '+g+'><img alt="" class="related-thumb-large" src="'+p+'" style="'+j+'"></a></li>':8==e?f+='<li class="related-post-item"><a class="related-post-item-wrapper" href="'+m+'" '+g+'><img alt="" class="related-thumb" src="'+p+'" style="'+j+'"><div class="related-title">'+o+'</div></a><div class="related-date">'+postdate+"</div></li>":9==e&&(f+='<li><a href="'+m+'" '+g+'><img alt="" class="related-thumb" src="'+p+'" style="'+j+'"><div class="related-title">'+o+'</div></a><div class="related-snippets">'+q+"</div></li>")}b.innerHTML=f+="</ul>"+k,d.callBack()}};randomRelatedIndex=j,startRelated=k,f(d.blogURL.replace(/\/$/,"")+"/feeds/posts/summary"+i+"?alt=json-in-script&orderby=updated&max-results=0&callback=randomRelatedIndex")}(window,document,document.getElementsByTagName("head")[0]);
//]]>
</script>
</b:if>

How to Customize the Related Posts Widget for Blogger?

To change the 'Related Posts' text that appears above the widget, modify the text in red:
relatedHeading: &quot;&lt;h4&gt;&lt;span&gt;Related Posts&lt;/span&gt;&lt;/h4&gt;&quot;,

To change the number of posts to display, change the '4' value from this line:
relatedPosts: 4,

Note: you may need to change the percentages in the CSS styles above in order to make posts fit the related container. Just follow the values in red and play with them until you get the best results.

To change the style of the related posts widget, modify the '4' value from:
relatedStyle: 4,

Available Related Posts Styles

1 - simple related posts widget that will show post titles only
2 - display post titles + snippets
3 - display thumbnails + titles + snippets
4 - display related posts thumbnails + titles + post date (default)
5 - display related posts thumbnails + titles
6 - post titles in front of thumbnails, instead of having them below the thumbnail
7 - display thumbnails only
8 - small thumbnails with titles on the right and date below
9 - small thumbnails with post titles and excerpts on the right


Customizing Related Post Thumbnail Size & Style

By default, thumbnails are resized and cropped automatically to be 300px wide by 200px tall. If you want to change the width and height of the thumbnails, modify the '300' and '200' values from:
thumbnailSize: &quot;w300-h200-p-nu&quot;,
defaultThumb: &quot;https://blogger.googleusercontent.com/img/b/R29vZ2xl/AVvXsEivMgO4cb0Li2DzMwD15ASM3OPq_MrE9JDuIjQ8pw3McjAXhPwxBCidUd8Vb-FZBzDfw6YlhOVT22mY4c8jOKymSyQTNzwP13zw_rbv6f7eKQBmoBzk7tOa_4zSmA252fLIYqFpbGLZT4tx/300-h200-c/no-thumb.png&quot;,
Note: 'w' comes from width, 'h' comes from height. To make the thumbnails square, change the 'h' (height) value and make it equal with 'w' (width) value. A higher value will result in more high-res images.

If you want thumbnails have rounded corners, change 'false' with 'true':
roundThumbs:false,

Customizing Related Titles & Excerpts

To shorten the post title, change auto with the number of characters to show:
titleLength: &quot;auto&quot;,

To reduce or add more characters to the snippets, change the "45" value:
snippetLength: 45,

If you want to center text (title and summary), change 'false' to 'true':
centerText:false,

To open links in a new tab when visitors click on a related post, change "false" to "true":
openNewTab: false

Once you're done with the settings, click the 'Save Template' button and you're ready to see the related posts widget live on your Blogger blog.

Final words

That's it! With the new customizable Related Posts widget for Blogger you will be able to add unique features to the related content section of your blog. However, all of these styles look and work slightly different, so take your time, and pick your favorite.

Friday, 29 January 2016

10 Best Programming Languages of 2015

1. Java
Java is considered as the perfect language for the developers and programmers to learn. Currently it is the top-most programming language and has grabbed the highest position with Android OS yet again, though it was a bit down a few years ago. Java can be utilized for mobile-based applications, enterprise level purpose, for creating desktop applications, and for establishing Android apps on tablets and smartphones.

2. PHP
The web developers should learn about PHP or Hypertext Preprocessor, a well-known programming language. With the help of PHP, you can enlarge a web app very quickly and effortlessly. PHP is the actual foundation of many strong content management systems, for example, WordPress. PHP is really a valuable programming language for the developers and programmers.

3. JavaScript
While you are expanding your site, JavaScript is extremely functional as this language can immensely assist you in generating communication for your website. You can utilize various in style frameworks in JavaScript for constructing superb user interface. When you’re into web development, it’s very important to known about JavaScript for making interactive web pages. JavaScript is applied for including animations on the web pages, loading fresh images, scripts or objects on web page, and craft hugely responsive user interfaces.

4. Python
For becoming skilled at all-in-one language, you should begin learning Python language that has the ability to expand web apps, data analysis, user interfaces, and many more, and frameworks are also available for these tasks. Python is utilized by bigger companies mostly that can evaluate vast data sets, thus this is a huge chance to learn it and be a Python programmer.

5. Objective-C
If you are the one who is interested on constructing apps for iOS, then you have to know about Objective-C language efficiently. The most preferred choice for all the web developers is Objective-C. When you have learnt Objective-C, you can begin applying XCode that is known to be the authorized software development tool from Apple. Thus you can quickly produce iOS app that can be noticeable in App Store.

6. Ruby
Another popular programming language is Ruby and Ruby on Rails. This can be learnt easily, and also very strong and clear-cut. If you’ve small time in hand and still want to craft any project, then you can surely utilize Ruby language. This programming language is applied massively for web programming, and hence turned out to be the ideal selection for the beginner companies.

7. Perl
Perl is also a well-accepted programming language that offers distinct tools for various obscure setbacks such as system programming. Though this programming language is a bit puzzling, but it is really a strong one that you can learn for this year, and renew your knowledge. Perl is mainly used for sites and web app expansion, desktop app development and system administration, and test automation that can be applied for testing databases, web apps, networking devices, and many more.

8. C, C++ and C#
You can increase your knowledge by learning about C this year that is unique programming language. Being the oldest, it should be learnt firstly when you start up, and it is mainly applied in forming different softwares.

C++ or C plus plus is a bit more progressive than C, and utilized immensely in forming hardware speeded games. It is an ideal selection for strong desktop software as well as apps for mobiles and desktop. Known to be the strongest language, C++ is applied in vital operating systems, such as Windows.

After learning these 2, you can go ahead in knowing about C# language. It won’t be difficult for you to get accustomed with C# after knowing C and C++. C# is actually the prime language for Microsoft applications and services. While executing with .Net and ASP technologies, you are required to be familiar with the C# accurately.

9. SQL
When you are executing on databases such as Microsoft SQL server, Oracle, MySQL, etc, you should be aware of SQL programming language or Standard Query Language. From this language, you can achieve the proficiency of acquiring the needed data from big and multifaceted databases.

10. Swift
Swift is reflected upon as the trendiest program language for expanding apps for Apple products. This language can be utilized by you for building up apps for iOS activated devices and Apple’s MAC in quick and simple method. When you are keen to expand a superb iOS application, then it is better for you to gain knowledge of Swift programming language.

Thursday, 12 March 2015

Building a List/Grid View Switcher in Blogger with Auto Read More

A list of posts in grid or list view provides a more defined canvas with which a blogger or website owner can use as a guide in creating content. This concept has extended to visitors, where they can have control on whether or not they wish to view posts in list or grid view. While custom modification codes are shared by some blogging sites, others are not. Some that are shared, however, can be complex even to bloggers themselves, such as JQuery.

The good news is there are lightweight codes available, including the Auto Read More in Blogger. Through it, a blogger can add two buttons that will enable visitors to switch between grid view and list view, depending on what they prefer. These buttons, however, are only visible on limited pages - homepage, label page and archive page. Nonetheless, it is better than not having this particular feature at all.

Unlike JQuery, the Auto Read More uses HTML, CSS and JavaScript. To view posts in a list view, two sets of CSS codes are added as one. Another set is added to view posts in grid view. Other combination of codes is used to enable easy switch between views, particularly at a click of a button.


How to Add a List/Grid View Switcher in Blogger

Step 1. Log into your Blogger dashboard and select your blog, then go to "Template" > press the "Edit HTML" button.

Step 2. Click anywhere inside the code area and press the CTRL + F keys to open the search box. Type this tag below inside the box and hit Enter to find it:
</head>
Step 3. Just above the </head> tag, copy and paste the following CSS style and scripts:
<script type='text/javascript'>
function list_view(){
if(document.getElementsByClassName(&quot;post&quot;)) {elementArray = document.getElementsByClassName(&quot;post&quot;); while (elementArray.length) {elementArray[0].className = &quot;post-grid-view&quot;;}}
if(document.getElementsByClassName(&quot;post-title&quot;)) {elementArray = document.getElementsByClassName(&quot;post-title&quot;); while (elementArray.length) {elementArray[0].className = &quot;post-title-grid&quot;;}}
}
function grid_view(){
if(document.getElementsByClassName(&quot;post-grid-view&quot;)) {elementArray = document.getElementsByClassName(&quot;post-grid-view&quot;); while (elementArray.length) {elementArray[0].className = &quot;post&quot;;}}
if(document.getElementsByClassName(&quot;post-title-grid&quot;)) {elementArray = document.getElementsByClassName(&quot;post-title-grid&quot;); while (elementArray.length) {elementArray[0].className = &quot;post-title&quot;;}}
}
</script>
 <script type='text/javascript'>
posts_no_thumb_sum = 100;
posts_thumb_sum = 350;
</script>

<script type='text/javascript'>
//<![CDATA[
function removeHtmlTag(strx,chop){
if(strx.indexOf("<")!=-1)
{
var s = strx.split("<");
for(var i=0;i<s.length;i++){
if(s[i].indexOf(">")!=-1){
s[i] = s[i].substring(s[i].indexOf(">")+1,s[i].length);
}
}
strx = s.join("");
}
chop = (chop < strx.length-1) ? chop : strx.length-2;
while(strx.charAt(chop-1)!=' ' && strx.indexOf(' ',chop)!=-1) chop++;
strx = strx.substring(0,chop-1);
return strx+'...';
}
function createSummaryAndThumb(pID, pURL, pTITLE){
var div = document.getElementById(pID);
var imgtag = "";
var img = div.getElementsByTagName("img");
var summ = posts_no_thumb_sum;
if(img.length>=1) {
imgtag = '<span class="posts-thumb" style="float:left; margin-right: 10px;"><a href="'+ pURL +'"><img src="'+img[0].src+'" /></a></span>';
summ = posts_thumb_sum;
}

else {
imgtag = '<span class="posts-thumb" style="float:left; margin-right: 10px;"><a href="'+ pURL +'" title="'+ pTITLE+'"><img src="https://blogger.googleusercontent.com/img/b/R29vZ2xl/AVvXsEiFQkgPQodKep2yeANXjS7GMIJ3kQUv83onB9FYy9Aj0RqCSYO5_RUmVmgZgnWH_cClqbah9EWmQnlkRMHc6_i5_qVJ3JcoI6fdlSWX2YjMhtu1APRuspl0lMBfrWLx3ZwRtaBGBXFDE_HV/s1600/sorry-image-not-available.png" style="margin-top: -30px;" /></a></span>';
summ = posts_thumb_sum;
}

var summary = imgtag + '<a href="'+ pURL +'"><div class="post-summary-text">' + removeHtmlTag(div.innerHTML,summ) + '</div></a>';
div.innerHTML = summary;
}
//]]>
</script>

<b:if cond='data:blog.pageType != &quot;static_page&quot;'>
<b:if cond='data:blog.pageType!= &quot;item&quot;'>
<style>
#list-view-button {font-family: Verdana; text-align:left;cursor:pointer;font-size: 14px;border-bottom: 5px solid #eaeaea;text-decoration: none;}
#list-view-button a{text-decoration: none; color: #666;}
.grid-view-button {background-color:#efefef;color:#666;padding:5px 10px;border-radius: 5px;font-size: 12px;}
.list-view-button {background-color:#efefef;color:#000;padding:5px 10px;border-radius: 5px;font-size: 12px;}
.post-grid-view {width:100%;height:250px;overflow: hidden;float:left;margin:0px 0px 20px !important;position:relative;display: block; -webkit-transition:all 0.5s ease 0s; -moz-transition:all 0.5s ease 0s; -o-transition:all 0.5s ease 0s; transition:all 0.5s ease 0s; }
.post-grid-view .posts-thumb {width:40% !important;height:250px !important;float:left;margin:0px;position:relative;border-top: 0px solid transparent !important;overflow: hidden;}
.post-grid-view .post-header {display: none;}
.post-grid-view .post-body img {min-width: 300px !important; min-height: 250px !important;display:block;width:100%!important;height:auto!important;max-width:800px!important;max-height:400px!important;border:none;outline:none;position:relative;margin: 0px;padding:0;}
.post-grid-view .post-summary-text {opacity: 1; background: none; width: 58%;font-size: 120% !important;clear: none !important; display: inline-block !important; padding: 80px 0px !important; color: #666 !important; text-shadow: none !important; float: right !important; text-align: left; position: relative !important; font-family: &#39;Open Sans Condensed&#39;, sans-serif;}
.post-grid-view .post-body {height: 250px;background:#f5f5f5; box-shadow: none !important;}
.post-title-grid a { font-size:170%;color: #777;font-family: &#39;Open Sans Condensed&#39;, sans-serif;}
.post-title-grid { position: absolute; left: 42%; top: 5%; z-index: 1;}
.post-grid-view .post-footer {left: 41%; display:block;position: absolute; bottom: 2%;font-size: 120%; background: transparent !important; border: 0px solid transparent !important;font-family: &#39;Open Sans Condensed&#39;, sans-serif;}
.post-grid-view .post-footer a{color: #128EC9;}
.post-grid-view a.comment-bubble {display: none;}
.main-inner .column-center-inner .section {margin: 0px !important;}
.post { -webkit-transition:all 0.5s ease 0s; -moz-transition:all 0.5s ease 0s; -o-transition:all 0.5s ease 0s; transition:all 0.5s ease 0s;}

#blog-pager {clear:both;}
.post {height:auto;width:32.2%;display:inline-block;text-decoration:none;float:left;margin:0 1% 1% 0%;overflow: hidden;padding:0!important;}
.date-header {display: none;}
h3.post-title a {font-size:90%;font-family: &#39;Open Sans Condensed&#39;, sans-serif;text-transform:uppercase;color:#fff;text-shadow: 1px 1px 0 rgba(0, 0, 0, 0.1);font-weight: bold;}
h3.post-title {text-align: center; position:absolute;top:0;width:100%;overflow:hidden;margin:0px !important;padding-top: 30%; background-color: rgba(50, 126, 213, 0.8);transform: scale(1);opacity: 0;z-index: 10;height: 100%;transition: all 300ms ease-out 0s;}
h3.post-title:hover {opacity: 1;}
.posts-thumb {width:100%!important;height:200px!important;overflow:hidden;clear:both;}
.post-body {border-radius:2px;box-shadow:0 5px 4px 1px rgba(0,0,0,0.1);position:relative;overflow: hidden;}
.post-body a {text-decoration: none;}
.post-body img {display:block;width:100%!important;height:auto!important;max-width:800px!important;max-height:400px!important;min-width:200px!important;min-height:200px!important;border:none;outline:none;position:relative;margin: 0px;padding:0;}
.post-summary-text {display: none;}
a.comment-bubble {color:#fff;text-decoration:none;font-size:100%;width: 100%;text-align: center;position:absolute;top:175px;left: 0px;text-shadow:1px 2px 1px #333;font-family: &#39;Pacifico&#39;, cursive;z-index: 122;}
a.comment-bubble:before { content: &quot;Comments: &quot; url(https://blogger.googleusercontent.com/img/b/R29vZ2xl/AVvXsEhqR0JOizlcHvKTaja9HvLh5RuzDc5x_536_bqobsyU7RriX9Ie_gj3wPxO0kpf2IF8HI6b0cgckhcUklkRh6SiU9kAke5E70VlqlMeQIx2Df4CSsvFIQL213yWvzvT7KRNm0G1kmACCvJ_/s1600/heart-active.png);}
.post-header,.post-footer {display:none;}
</style></b:if></b:if>
<link href='http://fonts.googleapis.com/css?family=Open+Sans+Condensed:300' rel='stylesheet' type='text/css'/>
<link href='http://fonts.googleapis.com/css?family=Pacifico' rel='stylesheet' type='text/css'/>

Step 4. Next, search for the following line:
<b:section class='main' id='main' name='Main' showaddelement='no'>
...in case you can't find it, search for this one instead:
<b:section class='main' id='main' name='Main' showaddelement='yes'>
Step 5. Just above this line, add the following code:
<b:if cond='data:blog.pageType != &quot;static_page&quot;'>
<b:if cond='data:blog.pageType!= &quot;item&quot;'>
<div id='list-view-button'><a class='grid-view-button' onclick='grid_view()'><img src='https://blogger.googleusercontent.com/img/b/R29vZ2xl/AVvXsEjEdILaOVuk1Wm1Oj9r8e8JS9wk3lPgIhkIxOCPW9mVGwNwI6DUymnKkTbREvE30q_Wpq97Gl8zMtLQ7ogCAxmaN8hsFFV337q1CnAhueTr9abxk1-6xbrM_0E9HvMuisKTVhRcOtf6KA2g/s1600/search-grid-icon.png' style='margin: -8px 1px -3px -6px;width: 16px;'/> Grid View</a> <a class='list-view-button' onclick='list_view()'><img src='https://blogger.googleusercontent.com/img/b/R29vZ2xl/AVvXsEirHKWTxVr8MxXedjDD8T2s1uzyGg6N0HQxtkwwRjHuoo4C11IGGqNOpLq8O_yM93FMLpkgDtqZObBJTDKfSMgJRXREUy_CoB7OGPImZwbmuT3DBznuae9odJEW2lLrkEuEiB79NBEYy1OG/s1600/icon-list-view.png' style='margin: -8px 1px -3px -6px;width: 16px;'/> List View</a></div>
</b:if></b:if>
Step 6. Now, search the code below:
<data:post.body/>
Step 7. You will find 3 occurrences of this code, replace only the second and third one with this one below:
 <b:if cond='data:blog.pageType != &quot;static_page&quot;'>
    <b:if cond='data:blog.pageType != &quot;item&quot;'>
        <div expr:id='&quot;summary&quot; + data:post.id'>
            <data:post.body/>
        </div>
        <script type='text/javascript'>createSummaryAndThumb(&quot;summary<data:post.id/>&quot;,&quot;<data:post.url/>&quot;);</script>
        <b:if cond='data:post.allowComments'>
            <a class='comment-bubble' expr:href='data:post.addCommentUrl' expr:onclick='data:post.addCommentOnclick'>
                <data:post.numComments/>
            </a>
        </b:if>
    </b:if>
</b:if>
<b:if cond='data:blog.pageType == &quot;item&quot;'>
    <data:post.body/>
</b:if>
<b:if cond='data:blog.pageType == &quot;static_page&quot;'>
    <data:post.body/>
</b:if>
Important: if you already added the auto read more script, remove the previous one in order to make this work.

Step 8. Finally, click "Preview" to see if everything looks good and press the 'Save Template' button to save the changes...

That's it!

Adding a dynamic view switcher on a blog will make viewing content a lot easier for visitors. Whether using a list or grid view, a more compressed list of posts will eliminate the need to click on the next page, which could take time if loading takes a while to complete. For a blog archive, using the Auto Read More codes in Blogger will surely make everyone's viewing experience very convenient.

Considering the ease with which the codes can be customized, building a list/grid view switcher would be completed in no time. A real bonus is that Auto Read More works on all platforms, with cross-browser support as well.

Friday, 6 March 2015

Add Masonry, Grid Layouts to Blogger Posts with CSS and Javascript

How a website's content is displayed can spell the difference between being popular and obscure. Anything that looks chaotic or hardly readable is never going to be anyone's favorite. This is why content must be displayed in an organized, easy to follow and straightforward manner. Nothing works better than a structured grid, in this case.

Posts listed in grid view provide an excellent viewing experience for both the blogger or website owner and the visitors. This is especially true if the grid comes with images that would play with a person's visual inclination. What is great about grids is the seamless and smooth layout, complemented with a structured yet simple architecture. This makes it easier to navigate through a blog archive or product page. The style also enables a website owner to present posts in a more artistic and informative manner, without delving into the details. Suffice to say that a grid view demands creativity to be effortlessly mixed with functionality.

How views can be switched depends on a number of changes in a blog's codes. Some are fairly easy to implement, while others can be a little complex. Not to worry, as there are guides that will be provided. Grid styles also come in huge varieties, with each one designed to cater to a specific audience. Now, are you ready to go on the grid?

Features

What features can you expect from a grid style post in Blogger?

  • All the posts will follow the grid style when switching to grid view.
  • While the codes are being customized, the posts are left untouched. Their length, however, could be changed accordingly.
  • Auto Read More will be applied on all posts.
  • Thumbnails are automatically added based on the first picture found in each post.
  • Code is secure and is used across the board. In fact, 99% of bloggers are using a similar code to enable grid style posts in blogger.

What are the benefits of grid style?

  • Quick loading time of posts. Since only the snippets are loaded in certain pages, or a thumbnail and a caption, pulling up a blog archive would be quicker. When loading time is decreased, user experience is greatly enhanced.
  • Professional-looking blog. Without the chaos and concerns on readability, a website can look really clean and professional. Combined with the right colors and images, it can also leave a visual impact.
  • Improved website ranking. Because visitors have to click in order to view the rest of the post, page views of a site will significantly increase. This makes for a better SEO strategy.

Although changes to the CSS codes have to be made to implement the grid style view and make it compatible with a blog's template, all the work will be worth it once it is up and running.

Important:
Before anything make sure that you backup your Blogger template! If have encounter any problems with your edits, you can revert the template back to its previous condition by restoring it from your backup. For this, go to 'Template' in the left menu > click on the 'Backup/Restore' button in the upper right corner and press the 'Download Full Template' button - choose where you want to save the file on your computer and click the 'Save' button.

Now we can safely proceed with editing our Blogger template. If you run into problems, just revert back to your saved template.

How to Create Masonry, Grid Style Posts in Blogger

Step 1. Log into your Blogger dashboard and click on the blog where you want to apply the grid style.
Step 2. Go to "Template" located on the left side of the screen and press the "Edit HTML" button.
Step 3. Click anywhere inside the code area and press the CTRL+F keys to open the search box, then type the following tag inside the box (hit Enter to find it):
</head>
Step 4. Now copy the script below and paste it just before the </head> tag:
<script type='text/javascript'>
posts_no_thumb_sum = 100;
posts_thumb_sum = 100;
</script>

<script type='text/javascript'>
//<![CDATA[
function removeHtmlTag(strx,chop){
if(strx.indexOf("<")!=-1)
{
var s = strx.split("<");
for(var i=0;i<s.length;i++){
if(s[i].indexOf(">")!=-1){
s[i] = s[i].substring(s[i].indexOf(">")+1,s[i].length);
}
}
strx = s.join("");
}
chop = (chop < strx.length-1) ? chop : strx.length-2;
while(strx.charAt(chop-1)!=' ' && strx.indexOf(' ',chop)!=-1) chop++;
strx = strx.substring(0,chop-1);
return strx+'...';
}
function createSummaryAndThumb(pID, pURL, pTITLE){
var div = document.getElementById(pID);
var imgtag = "";
var img = div.getElementsByTagName("img");
var summ = posts_no_thumb_sum;
if(img.length>=1) {
imgtag = '<span class="posts-thumb" style="float:left; margin-right: 10px;"><a href="'+ pURL +'"><img src="'+img[0].src+'" /></a></span>';
summ = posts_thumb_sum;
}

else {
imgtag = '<span class="posts-thumb" style="float:left; margin-right: 10px;"><a href="'+ pURL +'" title="'+ pTITLE+'"><img src="https://blogger.googleusercontent.com/img/b/R29vZ2xl/AVvXsEiFQkgPQodKep2yeANXjS7GMIJ3kQUv83onB9FYy9Aj0RqCSYO5_RUmVmgZgnWH_cClqbah9EWmQnlkRMHc6_i5_qVJ3JcoI6fdlSWX2YjMhtu1APRuspl0lMBfrWLx3ZwRtaBGBXFDE_HV/s1600/sorry-image-not-available.png" style="margin-top: -30px;" /></a></span>';
summ = posts_thumb_sum;
}

var summary = imgtag + '<a href="'+ pURL +'"><div class="post-summary-text">' + removeHtmlTag(div.innerHTML,summ) + '</div></a>';
div.innerHTML = summary;
}
//]]>
</script>
Step 5. Find the following code snippet using CTRL+F or Command + F:
<data:post.body/>
Step 6. After pressing the "Enter" key on your keyboard, you may find three occurrences of the above code, replace only the second and the third one with this code below:
<b:if cond='data:blog.pageType != &quot;static_page&quot;'>
    <b:if cond='data:blog.pageType != &quot;item&quot;'>
        <div expr:id='&quot;summary&quot; + data:post.id'>
            <data:post.body/>
        </div>
        <script type='text/javascript'>createSummaryAndThumb(&quot;summary<data:post.id/>&quot;,&quot;<data:post.url/>&quot;);</script>
        <b:if cond='data:post.allowComments'>
            <a class='comment-bubble' expr:href='data:post.addCommentUrl' expr:onclick='data:post.addCommentOnclick'>
                <data:post.numComments/>
            </a>
        </b:if>
    </b:if>
</b:if>
<b:if cond='data:blog.pageType == &quot;item&quot;'>
    <data:post.body/>
</b:if>
<b:if cond='data:blog.pageType == &quot;static_page&quot;'>
    <data:post.body/>
</b:if>

Step 7. Now choose one of the styles below, copy the code provided and paste it just above the </head> tag:

Simple Grid Design


<b:if cond='data:blog.pageType != &quot;static_page&quot;'>
<b:if cond='data:blog.pageType!= &quot;item&quot;'>
<style>
#blog-pager {
clear:both;
}
.post {
height: auto;
width:30.8%;
overflow: hidden;
display:inline-block;
text-decoration:none;
float:left;
margin:0 1.1% 2%;
padding: 0px !important;
}

h3.post-title a {
font-size:75%;
font-family: &#39;Open Sans Condensed&#39;, sans-serif;
text-transform:uppercase;
padding:0;
color:#444;
}
h3.post-title {
height: 26px;
text-align:center;
width:100%;
margin:0!important;
padding-bottom: 4%;
}
.date-header {
display: none;
}

.post-body a {
text-decoration: none;
}
.posts-thumb {
width:100%!important;
height:190px!important;
overflow:hidden;
clear:both;
}
.post-body img {
display:block;
width:100%!important;
height:auto!important;
max-width:800px!important;
max-height:400px!important;
min-width:190px!important;
min-height:190px!important;
border:none;
outline:none;
position:relative;
margin: 0px;
padding:0;
}
.post-summary-text {
color:#777;
font-size:100%!important;
font-family: &#39;Open Sans Condensed&#39;, sans-serif;
text-align:center;
clear:both;
overflow:hidden;
margin:5px 0 0;
padding:7% 10%;
}
a.comment-bubble {
color:#fff;
text-decoration:none;
font-size:100%;
font-weight: bold;
right:10px;
position:absolute;
top:165px;
text-shadow:1px 2px 1px #333;
font-family: &#39;Open Sans Condensed&#39;, sans-serif;
}
a.comment-bubble:before {
content: &quot;Comments: &quot;;
}
.post-header,.post-footer {
display:none;
}
</style></b:if></b:if>

<link href='http://fonts.googleapis.com/css?family=Open+Sans+Condensed:300' rel='stylesheet' type='text/css'/>

Grid Layout with Post Summary and Thumbnail

grid layout for blogger


<b:if cond='data:blog.pageType != &quot;static_page&quot;'>
<b:if cond='data:blog.pageType!= &quot;item&quot;'>
<style>
#blog-pager {
clear:both;
}
.post {
height:auto;
width:31%;
display:inline-block;
text-decoration:none;
float:left;
margin:0 1.1% 2%;
padding:0!important;
}
h3.post-title a {
font-size:75%;
font-family: &#39;Open Sans Condensed&#39;, sans-serif;
text-transform:uppercase;
color:#111;
padding:0;
}
h3.post-title {
text-align:center;
height:22px;
position:absolute;
bottom:23%;
width:100%;
z-index:101;
overflow:hidden;
margin:0!important;
padding:10px 0;
}
.date-header {
visibility:hidden;
height:0!important;
width:0!important;
margin:0!important;
padding:0!important;
}
.posts-thumb {
width:100%!important;
height:190px!important;
overflow:hidden;
clear:both;
border-bottom:3px solid #00C8BD;
border-top:3px solid #558ABB;
}
.posts-thumb:hover {
border-top:3px solid #FF664E;
border-bottom:3px solid #FEBE36;
}
.post-body {
border-radius:2px;
box-shadow:0 0 6px 1px rgba(0,0,0,0.1);
position:relative;
height:auto;
}
.post-body a {
text-decoration: none;
}
.post-body img {
display:block;
width:100%!important;
height:auto!important;
max-width:800px!important;
max-height:400px!important;
min-width:190px!important;
min-height:190px!important;
border:none;
outline:none;
position:relative;
margin: 0px;
padding:0;
}
.post-summary-text {
color:#555;
background:#f5f5f5 url(https://blogger.googleusercontent.com/img/b/R29vZ2xl/AVvXsEhf-vkcP8fJjzWHTOTFWtG9Mr5DZOe1NjPh9OYv6NQzM7I_vsEqi_GrSY5HNvYqCy2KMJO824-sFBABHDxq78Jjgei18q6dVCMizc1cDg_YtENFZy9T81xmj2pRtibohS7-8xjYFPU4hRLr/s1600/blueprint.png);
font-size:100%!important;
font-family: &#39;Open Sans Condensed&#39;, sans-serif;
text-align:center;
clear:both;
overflow:hidden;
margin:5px 0 0;
padding:17% 10% 6%;
}
a.comment-bubble {
color:#fff;
text-decoration:none;
font-size:110%;
right:10px;
position:absolute;
top:165px;
text-shadow:1px 2px 1px #333;
font-family: &#39;Pacifico&#39;, cursive;
}
a.comment-bubble:before {
content: &quot;Comments: &quot; url(https://blogger.googleusercontent.com/img/b/R29vZ2xl/AVvXsEhqR0JOizlcHvKTaja9HvLh5RuzDc5x_536_bqobsyU7RriX9Ie_gj3wPxO0kpf2IF8HI6b0cgckhcUklkRh6SiU9kAke5E70VlqlMeQIx2Df4CSsvFIQL213yWvzvT7KRNm0G1kmACCvJ_/s1600/heart-active.png);
}
.post-header,.post-footer {
display:none;
}
</style></b:if></b:if>

<link href='http://fonts.googleapis.com/css?family=Open+Sans+Condensed:300' rel='stylesheet' type='text/css'/>
<link href='http://fonts.googleapis.com/css?family=Pacifico' rel='stylesheet' type='text/css'/>

Grid Layout with Text Snippet on Hover

blogger posts


<b:if cond='data:blog.pageType != &quot;static_page&quot;'>
<b:if cond='data:blog.pageType!= &quot;item&quot;'>
<style>
#blog-pager {
clear:both;
}
.post {
height:auto;
width:31%;
display:inline-block;
text-decoration:none;
float:left;
margin:0 1.1% 2%;
padding:0!important;
}
h3.post-title a {
font-size:95%;
font-family: &#39;Open Sans Condensed&#39;, sans-serif;
text-transform:uppercase;
color:#fff;
padding:0;
text-shadow: 2px 2px 3px #222;
}
h3.post-title {
height: 22px;
text-align:center;
position:absolute;
top:1%;
width:100%;
z-index:101;
overflow:hidden;
margin:0!important;
padding:10px 0;
}
.date-header {
visibility:hidden;
height:0!important;
width:0!important;
margin:0!important;
padding:0!important;
}
.posts-thumb {
width:100%!important;
height:190px!important;
overflow:hidden;
clear:both;
}
.post-body {
border-radius:2px;
box-shadow:0 5px 4px 1px rgba(0,0,0,0.1);
position:relative;
overflow: hidden;
}
.post-body a {
text-decoration: none;
}
.post-body img {
display:block;
width:100%!important;
height:auto!important;
max-width:800px!important;
max-height:400px!important;
min-width:190px!important;
min-height:190px!important;
border:none;
outline:none;
position:relative;
margin: 0px;
padding:0;
}
.post-summary-text {
cursor: pointer;
background-color: rgba(44, 77, 163, 0.8);
color:#fff;
font-size:120%!important;
font-family: &#39;Open Sans Condensed&#39;, sans-serif;
clear:both;
overflow:hidden;
padding:25% 10% 0%;
left: 0;
position: absolute;
text-align: center;
vertical-align: bottom;
text-shadow: 1px 1px 0 rgba(0, 0, 0, 0.1);
top: 0;
transform: scale(1);
opacity: 0;
z-index: 10;
height: 100%;
transition: all 300ms ease-out 0s;
}
.post-summary-text:hover {
opacity: 1;
}
a.comment-bubble {
color:#fff;
text-decoration:none;
font-size:100%;
width: 100%;
text-align: center;
position:absolute;
top:165px;
left: 0px;
text-shadow:1px 2px 1px #333;
font-family: &#39;Pacifico&#39;, cursive;
z-index: 122;
}
a.comment-bubble:before {
content: &quot;Comments: &quot;;
}
.post-header,.post-footer {
display:none;
}
</style></b:if></b:if>
<link href='http://fonts.googleapis.com/css?family=Open+Sans+Condensed:300' rel='stylesheet' type='text/css'/>
<link href='http://fonts.googleapis.com/css?family=Pacifico' rel='stylesheet' type='text/css'/>

Masonry Layout (Pinterest Like Grid)

masonry layout for blogger


<b:if cond='data:blog.pageType != &quot;static_page&quot;'>
<b:if cond='data:blog.pageType!= &quot;item&quot;'>
<style>
#blog-pager {
clear: both;
position: absolute;
bottom: 0px;
left: 0px;
}
.blog-feeds {
display: none;
}
.post {
height: auto;
width: 100%;
padding: 0px !important;
margin: 0px 0px 30px;
display: inline-block;
text-decoration: none;
}
h3.post-title a{
font-size: 95%;
font-family: &#39;Open Sans Condensed&#39;, sans-serif;
text-transform: uppercase;
padding: 0px;
color: #fff;
text-shadow: 3px 2px 2px #222;
font-weight: bold;
}
h3.post-title, .comments h4 {
margin: 0px !important;
text-align: center;
padding: 10px 0px;
position: absolute;
top: 10px;
width: 100%;
z-index: 200;
}
.post-header {
display: none;
}
.date-header {
visibility: hidden;
height: 0px !important;
width: 0px !important;
padding: 0px !important;
margin: 0px !important;
}
.posts-thumb {
width: 100%;
height: auto;
overflow: hidden;
clear: both;
}
.post-body {
overflow: hidden;
position:relative;     
}
.post-body a {
text-decoration: none;
}
.post-body img {
display: block;
width: auto;
height: auto;
max-width: 100%;
max-height: none;
min-width: 100%;
min-height: auto;
margin: 0px;
padding: 0;
border: none;
outline: none;
position: relative;
}
.post-summary-text {
cursor: pointer;
background-color: rgba(44, 77, 163, 0.8);
color:#fff;
font-size:120%!important;
font-family: &#39;Open Sans Condensed&#39;, sans-serif;
clear:both;
overflow:hidden;
padding:25% 10% 0%;
left: 0;
position: absolute;
text-align: center;
vertical-align: bottom;
text-shadow: 1px 1px 0 rgba(0, 0, 0, 0.1);
top: 0;
transform: scale(1);
opacity: 0;
z-index: 10;
height: 100%;
transition: all 300ms ease-out 0s;
}
.post-summary-text:hover {
opacity: 1;
}
.post-footer {
display: none;
}
a.comment-bubble {
color: #fff;
text-decoration: none;
font-size: 120%;
right: 5px;
z-index: 222;
position: absolute;
top: 5px;
text-shadow: 1px 2px 1px #333;
font-family: &#39;Open Sans Condensed&#39;, sans-serif;
}
a.comment-bubble:before {
content: url(https://blogger.googleusercontent.com/img/b/R29vZ2xl/AVvXsEhqR0JOizlcHvKTaja9HvLh5RuzDc5x_536_bqobsyU7RriX9Ie_gj3wPxO0kpf2IF8HI6b0cgckhcUklkRh6SiU9kAke5E70VlqlMeQIx2Df4CSsvFIQL213yWvzvT7KRNm0G1kmACCvJ_/s1600/heart-active.png);
}
.main-inner .column-center-inner {
-moz-column-count: 3;
-moz-column-gap: 1px;
-webkit-column-count: 3;
-webkit-column-gap: 1px;
column-count: 3;
column-gap: 1px;
width: 100%;
padding: 0px !important;
}
</style></b:if></b:if>

<link href='http://fonts.googleapis.com/css?family=Open+Sans+Condensed:300' rel='stylesheet' type='text/css'/>

Please note that the masonry layout might not work if you have a customized template, also older posts will appear vertically (from top to bottom) instead of left to right.

Step 8. Click "Preview" and if everything looks fine, press the "Save Template" button.


That's it!

Implementing a grid style view has its pros and cons, but the benefits clearly outweigh the disadvantages. The fact that a website will look visually appealing and professional when set in grid style, is already enough to boost its online reputation. An increase in page views is just the beginning. With the right images and content, a blog will also have better SEO. Most importantly, implementing the changes is not as complex as some might think. With a step-by-step guide available, adding a dynamic view switcher would be completed in no time.

Friday, 2 May 2014

Display Blogger Posts in Grid View with Thumbnails

Grid View with Thumbnails is a script for self-hosted Blogger blogs which will display blog posts as a thumbnail grid of images in homepage and archive pages. Instead of sending your blog visitors to a page that displays all the posts in full length with a large image which takes up too much space and requires too much scrolling, now you could have a clean page that displays a gallery grid, with thumbnails and post titles, linking back to the source post for that thumbnail. Let's take a look at what it could look like in this demo blog.

grid view on blogger posts

If you have a wallpaper or photo blog that would benefit from displaying a thumbnail grid style layout, look no further. Here's how you can add Grid (gallery) View to Blogger posts.

Adding Grid (Gallery) View to Blogger Posts


Step 1. Log in to your Blogger account and go to Template > click on the Edit HTML button

blogger template html

Step 2. Click anywhere inside the code area and press the CTRL + F keys to open the search box


Step 3. Type </head> inside the search box and hit Enter to find it.

Step 4. Just above the </head> tag, add the following script and style:
<script src="http://code.jquery.com/jquery-1.9.1.js"></script>
<script src="http://code.jquery.com/jquery-migrate-1.1.0.js"></script>

<b:if cond='data:blog.pageType == &quot;index&quot;'>
<script type='text/javascript'>//<![CDATA[
$(document).ready(function() {

    var width = 200;
    var height = 170;
    var placeholder = 'https://blogger.googleusercontent.com/img/b/R29vZ2xl/AVvXsEhlu1VckW9PSY_TCi5C8khmLou8tCST4MUt2q4TVemKaq32RGQN1AWzfXNn9MIabaXpyX7RUmn4dzhUBSfOVZ6JlMbmDnazj2B-P63vh2M0GJkJWhnsDBNJwFLso0XGmLpiuu9efMwhnH0/s1600/no-thumb.png';
    var margins = "0px 0px 10px 10px";
    var fitThumb = 1;
    var titleTopPadding = 5;
    var titleBottomPadding = 8;
    var titleLeftRightPadding = 5;

    var titlePadding = titleTopPadding + 'px ' + titleLeftRightPadding + 'px ' + titleBottomPadding + 'px ' + titleLeftRightPadding + 'px';
    $('.post-body').each(function(n, wrapper) {
        var wrapper = $(wrapper);
        var image = $(wrapper).find('img').first();
        var link = wrapper.parent().find('h3 a');
        var linkURL = link.attr('href');
        var linkTitle = link.text();

        $(link).remove();
        wrapper.empty();

        if (image.attr('src')) {
            var thumbHeight = image.attr('height');
            var thumbWidth = image.attr('width');
            var thumbParent = $(image).parent();

            wrapper.append(thumbParent);

            if (fitThumb) {
                image.attr({
                    src: image.attr('src').replace(/s\B\d{3,4}/, 's' + width + '-c')
                    });
                image.attr('width', width).attr('height', height);
            } else {
                image.attr({
                    src: image.attr('src').replace(/s\B\d{3,4}/, 's' + width)
                    });
                image.attr('width', width);
                var changeHeight = (thumbHeight / thumbWidth * width).toFixed(0);
                image.attr('height', changeHeight);
            }

        } else {
            var image = $('<img>').attr('src', placeholder).attr('height', height).attr('width', width);
            var thumbParent = $('<a>').append(image).appendTo(wrapper);
        }

        thumbParent.attr('href', linkURL).css('clear', 'none').css('margin-left', '0').css('margin-right', '0').addClass('postThumbnail');

        var thumbTitle = $('<div>').prepend(linkTitle).css('padding', titlePadding).css('opacity', '0.9').css('filter', 'alpha(opacity=0.9)').css('width', width).appendTo(thumbParent);
        var ptitleHeight = thumbTitle.height();
        var summary = parseInt(ptitleHeight) + parseInt(titleTopPadding) + parseInt(titleBottomPadding);
        thumbTitle.css('margin-top', '-' + summary + 'px');
        wrapper.css('float', 'left').css('height', height).css('width', width).css('margin', margins).css('overflow', 'hidden');
    });
    $('#blog-pager').css('clear', 'both');
});

function hideLightbox() {
    var images = document.getElementsByTagName('img');
    for (var i = 0; i < images.length;++i) {
        images[i].onmouseover = function() {
            var html = this.parentNode.innerHTML;
            this.parentNode.innerHTML = html;
            this.onmouseover = null;
        };
    }
}

if (window.addEventListener) {
    window.addEventListener('load', hideLightbox, undefined);
} else {
    window.attachEvent('onload', hideLightbox);
}
//]]>
</script>
<style>
.post {
    border-bottom: 0 dotted #E6E6E6;
    margin-bottom: 0;
    padding-bottom: 0;
}

h2,.post-footer {
    display: none;
}

a.postThumbnail div {
    text-decoration: none;
    color: #fff;
    font-size: 12px;
    font-weight: bold;
    text-transform: capitalize;
    background: rgb(125,126,125);
 /* Old browsers */
    background: -moz-linear-gradient(top,  rgba(125,126,125,1) 0%, rgba(14,14,14,1) 100%);
    background: -webkit-gradient(linear, left top, left bottom, color-stop(0%,rgba(125,126,125,1)), color-stop(100%,rgba(14,14,14,1)));
 /* Chrome,Safari4+ */
    background: -webkit-linear-gradient(top,  rgba(125,126,125,1) 0%,rgba(14,14,14,1) 100%);
    background: -o-linear-gradient(top,  rgba(125,126,125,1) 0%,rgba(14,14,14,1) 100%);
    background: -ms-linear-gradient(top,  rgba(125,126,125,1) 0%,rgba(14,14,14,1) 100%);
    background: linear-gradient(to bottom,  rgba(125,126,125,1) 0%,rgba(14,14,14,1) 100%);
    filter: progid:DXImageTransform.Microsoft.gradient( startColorstr=&#39;
    #7d7e7d&#39;, endColorstr=&#39;#0e0e0e&#39;,GradientType=0 );
}

a.postThumbnail:hover div {
    display: block;
}

.post-body img {
    background-color: transparent;
    border: 1px solid transparent;
    padding: 0px;
    -webkit-border-radius: 12px;
    -moz-border-radius: 12px;
    border-radius: 12px;
    opacity: 1;
    transition: opacity .25s ease-in-out;
    -moz-transition: opacity .25s ease-in-out;
    -webkit-transition: opacity .25s ease-in-out;
}

.post-body img:hover {
    -ms-filter: &quot;
    progid: DXImageTransform.Microsoft.Alpha(Opacity=70)&quot;
    ;

filter: alpha(opacity=70);
    -moz-opacity: 0.7;
    -khtml-opacity: 0.7;
    opacity: 0.7;
}
</style>
</b:if>
Note:
- If you want to make the post thumbnails larger, modify the 200 (width) and 170 (height) values in blue
- To change the default thumbnail for when there are no images, replace the URL in red with your own.

Step 5. Click on the Save template button to save the changes and View your blog. Now you should have a nice grid view on your Blogger posts. Enjoy!

Monday, 10 March 2014

How to Use Cookies in Javascript

Each time we visit a website, cookies can be stored to 'remember' things that we do while browsing a page. This may happen, for example, when we visit a page where we have to login with an username and a password. In this case, after verifying that the login is correct, usually a cookie is recorded on our computer.

An example would be the popular page of Google. This search engine allows users to choose how many search results they want to see on each page. Thanks to a cookie, this configuration remains unchanged for each computer, even after rebooting several sessions. Despite this, it is good to remove them from time to time because, although, some will expire being erased automatically after a while, some of them will never do so.
cookies with javascript, blogger tricks

Like many other things, cookies may suffer a poor use and hence their bad reputation. For instance, some websites can store and study the browsing habits of a user without their knowledge. This is why most browsers already include a system to filter them and can decide if they will provide some privacy or not.

If you want to see a live example of how a cookie works, please visit this page and refresh it a few times. You should get an alert window telling you about how many times you visited the page.
(script source: javascriptkit.com)

There could be other ways to use cookies but a server could do this with JavaScript. Below we have a simple script that can be used as many times we want, even for different purposes. Basically, what the following script does is to create three functions: the first one is to set a cookie, the second one is to read it, and the last one is to erase it. We can apply it in Blogger by accessing the template HTML and add it just before the </head> tag:
<script type='text/javascript'>
//<![CDATA[

// Set cookie
function setCookie(name, value, expires, path, domain, secure) {
document.cookie = name + "=" + escape(value) +
((expires == null) ? "" : "; expires=" + expires.toGMTString()) +
((path == null) ? "" : "; path=" + path) +
((domain == null) ? "" : "; domain=" + domain) +
((secure == null) ? "" : "; secure");
}

// Read cookie
function getCookie(name){
var cname = name + "=";
var dc = document.cookie;
if (dc.length > 0) {
begin = dc.indexOf(cname);
if (begin != -1) {
begin += cname.length;
end = dc.indexOf(";", begin);
if (end == -1) end = dc.length;
return unescape(dc.substring(begin, end));
}
}
return null;
}

//delete cookie
function eraseCookie (name,path,domain) {
if (getCookie(name)) {
document.cookie = name + "=" +
((path == null) ? "" : "; path=" + path) +
((domain == null) ? "" : "; domain=" + domain) +
"; expires=Thu, 01-Jan-70 00:00:01 GMT";
}
}

//]]>
</script>
Once done, in order to set a cookie, we only need to put the name and the value in quotes when we call the function. Additionally, we will set the expiry date by getting the current Time (in milliseconds) and add the required number of minutes (in milliseconds):
var expiration = new Date();
expiration.setTime(expiration.getTime() + 10000); //Expire after 10 seconds
setCookie("cookiename","hello",expiration);
}
The above code sets a cookie called cookiename, with the hello value and set its expiry date to 10 seconds after it has been set (10000 milliseconds = 10 seconds). If we want to restore the value of this cookie, then we should use the second function with the cookie name:
var checkCookie = getCookie("cookiename");
By adding this code below <body>, we created a cookie with the value 'hello' which can be shown on the screen if we want to. The cookie will disappear after 10 seconds:
<script type='text/javascript'>
var expiration = new Date();
expiration.setTime(expiration.getTime() + 10000);
setCookie("cookiename","hello",expiration);
var checkCookie = getCookie("cookiename");
document.write(checkCookie);
</script>
The erase function is used in the same way as the one for reading just by clicking on the name of the cookie. The setCookie values for 'domain' and 'secure' are not utilized. Use 'domain' on the Javascript cookie if you are using it on a subdomain, where the cookie is set on the widgets subdomain, but you need it to be accessible over the whole yoursite.com domain.

The combination of these three functions will allow us to handle cookies for specific purposes, as we will see in the near future.

Monday, 3 February 2014

How to Increase Thumbnail Resolution on Blogger

When we add a widget on Blogger, the thumbnails will keep a default size of 72 x 72px which might not look good if we try to make them bigger using only CSS. However, with a bit of JavaScript we'll be able to replace the thumbnail with the same image of higher resolution and this way, larger images will no longer appear blurry.

In this tutorial we will see how we can replace the default thumbnail size of the popular posts widget even though we can apply this trick on any of the blog widgets.


Changing the Thumbnail Size for the Popular Posts Widget

Step 1. First, let's add the Popular posts gadget by going to Layout > click on the Add a gadget link and select Popular Posts from the popup window.

adding popular posts gadget

Step 2. Next, go to Template > click on the Edit HTML button > click anywhere inside the code area and press CTRL + F keys to open the Blogger search box.

edit blogger template html

Step 3. Type or paste the following tag inside the search box then hit Enter to find it:
</head>
After you found the </head> tag, add this CSS above it:
<style type='text/css'>
.PopularPosts .item-thumbnail a {
clip: auto;
display: block;
height: 130px;
margin: 0 0px 5px;
overflow: hidden;
width: 210px;
border: 2px solid #EEEEEE;
border-radius: 20px;
}
.PopularPosts .item-thumbnail img {
position: relative;
top: -30px;
transition:all .2s linear;
 -o-transition:all .5s linear;
-moz-transition:all .2s linear;
-webkit-transition:all .2s linear;
}
.PopularPosts .item-thumbnail img:hover{
opacity:.6;
filter:alpha(opacity=60)
}
.PopularPosts .widget-content ul li {
background: #F9F9F9;
border: 2px solid #EEEEEE;
border-radius: 10px;
box-shadow: 0 4px 10px #EEEEEE;
color: #555555;
padding: 10px;
margin-bottom: 5px;
}
.PopularPosts .item-title {
clear: both
font: 14px Cambria,Georgia, sans-serif;
color: #2288BB;
font-weight: bold;
text-transform: uppercase;
text-align: center;
}
.PopularPosts .item-snippet {
display: none;
}
.widget .widget-item-control a img {
height: 18px;
width: 18px;
}
</style>
Step 4. Now search for this tag:
</body>
... and just above it, add this script:
<script type='text/javascript'>                  
function changeThumbSize(id,size){
var blogGadget = document.getElementById(id);
var replacement = blogGadget.innerHTML;
blogGadget.innerHTML = replacement.replace(/w72-h72-p-nu/g,"s"+size+"-c");
var thumbnails = blogGadget.getElementsByTagName("img");
for(var i=0;i&lt;thumbnails.length;i++){
thumbnails[i].width = size;
thumbnails[i].height = size;
}
}
changeThumbSize("PopularPosts1",210);                  
</script>
What I highlighted in red is the widget ID for the Popular Posts gadget. To change the thumbnail size for any of your blog widgets, first you need to find the gadget/widget ID and then add a line below this part:
changeThumbSize("PopularPosts1",210);
changeThumbSize("widget-ID-HERE",210);
 ... and replace widget-ID-HERE text with the ID of that widget/gadget.

Note: you won't see the changes if the widget has a class selector - for this you may need to change class with id and replace the dot "." symbol with "#" within the CSS...

If you don't know how to find the id of a particular widget, please check out this tutorial on How to Use Firebug to Design a Blogger blog.

Step 5. Finally, press the Save Template to save the changes. And that's it!